
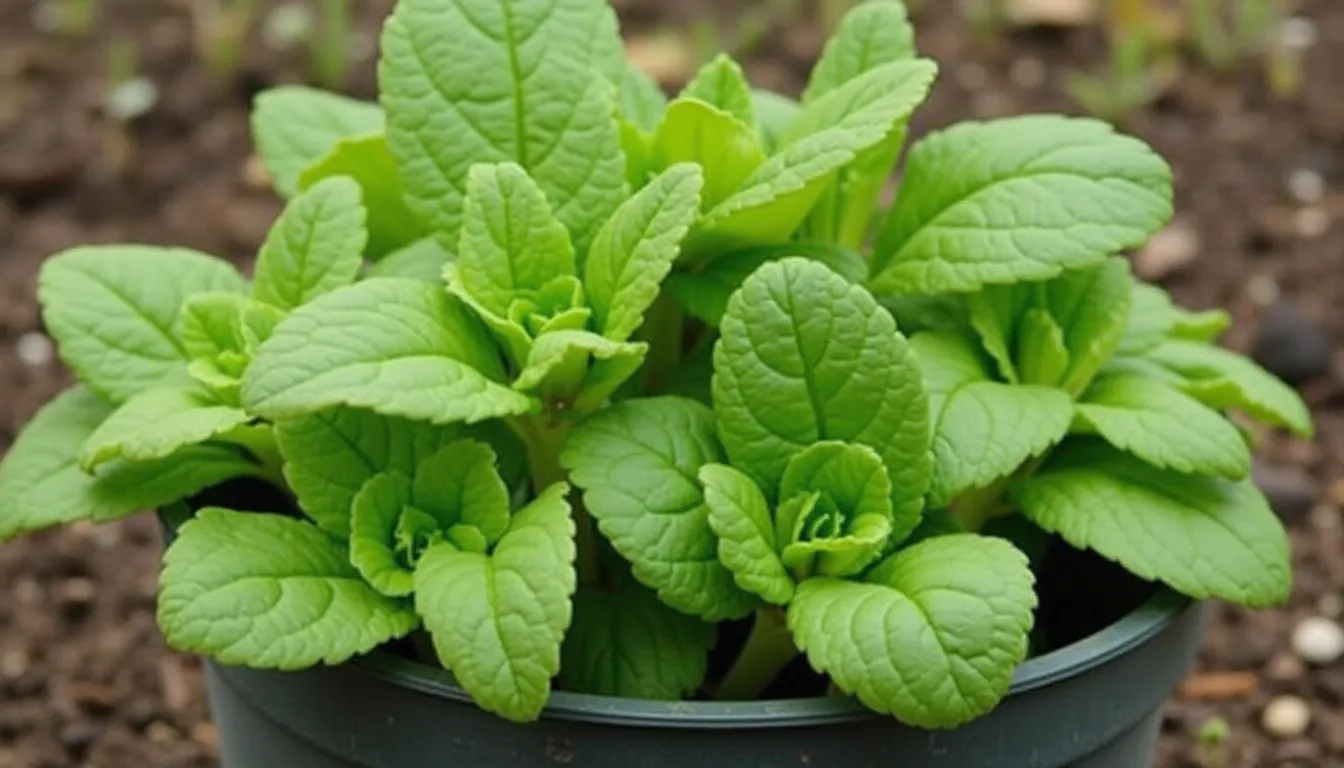
The 5-Gallon Bucket Gardening : Tips and Guide
Have you ever looked at your small patio, tiny balcony, or compact backyard and wished you could grow fresh vegetables and herbs? What if I told you that a simple 5-gallon bucket from your local hardware store could be the answer to all your gardening dreams?
Bucket gardening has quietly become one of the most practical and rewarding ways to grow food at home. It doesn’t matter if you’re renting an apartment, dealing with poor soil, or simply want more control over your plants—a 5-gallon bucket gives you the freedom to garden almost anywhere.
In this guide, I’ll walk you through everything you need to know about bucket gardening, from choosing the right containers to harvesting your first homegrown tomatoes. Whether you’re a complete beginner or looking to expand your existing garden, you’ll find practical tips and ideas that actually work.
Why 5-Gallon Bucket Gardening Works So Well
There’s something almost magical about growing vegetables in buckets. These simple containers solve so many common gardening problems that frustrated gardeners have dealt with for years.
Perfect size for most plants. A 5-gallon bucket provides enough soil volume for deep root systems. Tomatoes, peppers, cucumbers, beans, and most herbs thrive in this amount of space. The roots have room to spread out and access plenty of nutrients and water.
Complete mobility. Unlike traditional garden beds, you can move your buckets anywhere. Chasing the sun throughout the day? No problem. Need to bring tender plants inside before a frost? Easy. Want to rearrange your garden layout? Just pick them up and move them.
Better soil control. When you garden in buckets, you choose exactly what soil goes into each container. If your yard has clay-heavy or contaminated soil, buckets let you start fresh with premium potting mix tailored to your plants’ needs.
Pest and disease management. Raised off the ground, bucket gardens experience fewer problems with soil-borne diseases, slugs, and certain insects. It’s also easier to inspect your plants and catch problems early.
Accessibility matters. For anyone with back pain, knee problems, or mobility challenges, bucket gardening reduces the bending and kneeling required. Place buckets on stands or elevated surfaces, and gardening becomes comfortable again.
Choosing Your Buckets: What Works Best
Not all 5-gallon buckets are created equal when it comes to gardening. Here’s what you need to know before you start collecting containers.
Food-grade buckets are your safest choice. These buckets originally held food products and don’t contain harmful chemicals that could leach into your soil. Look for a recycling symbol with a “2” or “5” inside—these plastics (HDPE and PP) are considered safe for growing food. Many restaurants and bakeries give away food-grade buckets that once held frosting, pickles, or other ingredients.
Avoid buckets that held chemicals. Paint buckets, industrial chemical containers, and similar buckets may contain residues that persist even after washing. It’s simply not worth the risk when growing food you’ll eat.
Color considerations. Blue gardening buckets have become popular, and for good reason. Lighter colors reflect heat better than dark containers, keeping roots cooler during hot summer days. White, light blue, and light gray buckets work especially well in warm climates. However, any color works if you’re willing to provide shade or insulation.
Metal buckets for gardening. Galvanized metal buckets make beautiful container gardens and work well for ornamental plants and herbs. However, they heat up quickly in direct sun, which can stress plant roots. If you use metal buckets, consider painting them a light color or placing them where they’ll get afternoon shade.
Setting Up Your Bucket Garden: The Essential Steps
Before you add soil and plants, proper bucket preparation makes all the difference between struggling plants and abundant harvests.
Drainage is absolutely critical. Without drainage holes, water accumulates at the bottom, rotting roots and killing plants. Use a drill with a half-inch bit to create five to seven holes in the bottom of each bucket. Space them evenly across the entire bottom surface.
Add a layer of small rocks or broken pottery. Place about an inch of gravel, pebbles, or pottery shards in the bottom of each bucket. This layer prevents soil from washing out through drainage holes while ensuring excess water can escape.
Choose the right soil mix. Regular garden soil compacts too much in containers, suffocating roots and preventing proper drainage. Instead, use a quality potting mix or make your own blend. A good recipe combines equal parts peat moss (or coconut coir), vermiculite or perlite, and compost. This creates a light, fluffy medium that holds moisture while draining excess water.
Consider adding slow-release fertilizer. Mix a balanced, slow-release fertilizer into your soil when filling buckets. This provides steady nutrition throughout the growing season, reducing the need for frequent feeding.
The Self-Watering Bucket Game-Changer
Let me share one of the best innovations in bucket container gardening: the self-watering system. If you’ve ever forgotten to water your plants or gone on vacation and returned to wilted vegetables, this technique will change your life.
How self-watering bucket gardening works. These systems create a water reservoir at the bottom of your bucket, separated from the soil by a barrier. A small section of soil extends down into the reservoir through a pipe or fabric, wicking water upward as the soil dries. Plants take water as they need it, staying consistently hydrated without the feast-or-famine cycle of hand watering.
Building your own system. You can create a simple self-watering bucket using two buckets of the same size. Cut the bottom out of one bucket, drill numerous small holes in it, and nest it inside the intact bucket with a small gap between them. Add a PVC pipe through the soil to fill the reservoir. This bottom layer holds water while the upper bucket contains your soil and plants.
The benefits are remarkable. Self-watering containers reduce watering frequency to once or twice a week, even in hot weather. Plants grow more consistently because soil moisture stays steady. You’ll see healthier root systems, bigger harvests, and fewer stress-related problems.
Smart Bucket Gardening Stand Solutions
Elevating your buckets off the ground provides multiple benefits. Better drainage, easier access, improved air circulation, and protection from ground-dwelling pests all come from getting containers up off the surface.
Simple DIY bucket gardening stand plans. The easiest approach uses cinder blocks. Stack two blocks horizontally for each bucket, creating stable, sturdy platforms. This simple method costs almost nothing and provides perfect drainage.
Wooden stand options. Build a basic frame from 2×4 lumber that holds multiple buckets at a comfortable working height. A simple design might have four legs connected by crosspieces, with circular cutouts that hold bucket rims. Sand and seal the wood to prevent rot.
Ready-made bucket gardening 5-gallon stands. Commercial plant stands work beautifully if you prefer a finished look. Metal plant stands with wheels offer maximum flexibility, letting you easily move heavy buckets full of soil and plants.
Height considerations. A 12 to 18-inch elevation works well for most gardeners. This height improves drainage without making plants difficult to reach. If you have mobility limitations, higher stands bring plants to a more comfortable level.
Best Plants for Bucket Vegetable Gardening
Choosing the right vegetables makes bucket gardening much more successful and enjoyable. Some plants adapt beautifully to container life, while others struggle in limited space.
Tomatoes are bucket garden superstars. Determinate varieties (also called bush tomatoes) work especially well because they stay compact. Plant one tomato per 5-gallon bucket. Popular varieties include ‘Patio Princess,’ ‘Bush Early Girl,’ and ‘Roma.’ Even some indeterminate varieties like ‘Sweet 100’ cherry tomatoes thrive in buckets with proper support.
Peppers love bucket life. Both sweet bell peppers and hot peppers grow beautifully in 5-gallon containers. Plant one pepper per bucket. They need full sun and consistent watering. Varieties like ‘California Wonder’ bells, ‘Jalapeno,’ and ‘Hungarian Hot Wax’ all perform excellently.
Cucumbers climb up, not out. Choose bush or compact varieties for bucket success. ‘Bush Slicer,’ ‘Spacemaster,’ and ‘Picklebush’ stay manageable in containers. Provide a small trellis or cage, and you’ll harvest fresh cucumbers all summer from a single bucket.
Lettuce and greens thrive. Leafy vegetables like lettuce, spinach, arugula, and kale grow quickly in buckets. You can fit several plants in one container since their roots don’t need as much depth. Cut leaves as you need them, and plants keep producing.
Beans climb or bush. Bush bean varieties like ‘Blue Lake Bush’ and ‘Contender’ work perfectly in buckets. If you prefer pole beans, add a trellis or teepee structure for vines to climb. You’ll get more beans from pole varieties in the same space.
Herbs practically grow themselves. Basil, parsley, cilantro, oregano, thyme, and rosemary all excel in bucket gardens. Many herbs actually prefer the excellent drainage containers provide. One bucket can hold multiple herb plants if they have similar water needs.
Root vegetables need depth. Carrots, potatoes, and radishes work in 5-gallon buckets because they provide enough depth. For carrots, choose shorter varieties like ‘Thumbelina’ or ‘Short ‘n Sweet.’ For potatoes, plant two or three seed potatoes per bucket and hill them up as they grow.
Bucket Gardening Ideas for Every Space
The versatility of bucket container gardening means you can create productive gardens in surprising places. Let your imagination guide you as you discover new ways to use this flexible growing method.
Balcony paradise. Apartment balconies become productive vegetable gardens with carefully arranged buckets. Choose a mix of vegetables and herbs. Add some colorful flowers in a few buckets for beauty. Arrange them in tiers using plant stands to maximize vertical space.
Patio garden rooms. Use buckets to create defined areas on a deck or patio. Group tomatoes, peppers, and herbs together in one corner. Place cucumber and bean buckets with trellises to create a living privacy screen. This approach combines function with aesthetics.
Vertical bucket walls. Mount sturdy brackets to a fence or wall, then hang buckets at different heights. This technique works especially well for herbs and lettuce. You can also purchase or build wooden pallet planters that hold multiple buckets vertically.
Mobile kitchen gardens. Place buckets on wheeled plant caddies, and you can move your entire garden to follow the sun or make room for outdoor entertaining. This flexibility helps you optimize growing conditions throughout the season.
Themed bucket collections. Create specialized mini-gardens like a salsa garden (tomatoes, peppers, cilantro, onions), pizza garden (tomatoes, basil, oregano, peppers), or tea garden (mint, chamomile, lemon balm). These focused collections make meal planning easy and fun.
Decorative bucket displays. Paint buckets in coordinating colors, stencil designs, or wrap them with burlap and twine. Attractive containers make vegetable gardening feel less utilitarian and more like an artistic expression.
Essential Bucket Gardening Technique Tips
Success in container gardening comes down to mastering a few key techniques. These practical skills help your plants thrive from spring through fall harvest.
Water deeply but not too frequently. Container plants need more water than garden beds, but overwatering kills more plants than underwatering. Check soil moisture by sticking your finger two inches deep. If it feels dry, water thoroughly until excess drains from the bottom. In hot weather, this might mean daily watering. In cooler periods, every few days suffices.
Feed regularly throughout the season. Container soil has limited nutrients that wash away with frequent watering. Apply a balanced liquid fertilizer every two to three weeks during the growing season. Fish emulsion, compost tea, or commercial vegetable fertilizers all work well. Follow package directions carefully to avoid burning plants.
Provide proper support structures. Tomatoes, peppers, and climbing vegetables need support as they grow. Install stakes or cages when plants are young to avoid disturbing roots later. Push stakes deep into the bucket for stability.
Watch for and treat problems quickly. Check plants regularly for pests, diseases, and nutrient deficiencies. Catching problems early makes treatment easier and more effective. Remove affected leaves promptly, and isolate sick plants to prevent spreading issues.
Rotate crops between seasons. Don’t plant the same vegetable family in the same bucket year after year. This practice, called crop rotation, prevents disease buildup and nutrient depletion. If tomatoes grew in a bucket this year, plant beans or lettuce there next season.
Refresh soil annually. Potting mix breaks down and compacts over time. Each spring, dump out old soil, mix it into your compost, and refill buckets with fresh potting mix. This reset gives plants the best possible growing environment.
Bucket Gardening for Beginners: Your First Season
Starting your first bucket garden feels exciting and maybe a little intimidating. Focus on these beginner-friendly strategies to build confidence and skills.
Start small your first year. Begin with just five to ten buckets rather than trying to plant fifty. This manageable number lets you learn without becoming overwhelmed. You can always expand next season.
Choose easy, forgiving plants. Tomatoes, peppers, lettuce, radishes, and herbs like basil forgive beginner mistakes and still produce good harvests. Save challenging plants like cauliflower and melons for when you have more experience.
Create a simple watering schedule. Check your buckets every morning during the growing season. This daily habit helps you notice problems early and ensures plants get consistent moisture. As you gain experience, you’ll develop an intuitive sense of when plants need water.
Keep a garden journal. Write down what you plant, when you plant it, and how it performs. Note challenges you face and solutions that work. This record becomes invaluable for planning next year’s garden.
Connect with other gardeners. Join online gardening groups, visit community gardens, or chat with neighbors who garden. Experienced gardeners love sharing advice, and their insights help you avoid common mistakes.
Celebrate every success. Your first homegrown tomato deserves celebration, even if the plant only produces three fruits. Growing food successfully—even in small amounts—represents real achievement.
Creative Storage: The Gardening Bucket Caddy DIY
Managing gardening tools and supplies becomes easier with smart organization. A DIY gardening bucket caddy keeps everything you need within arm’s reach.
Basic bucket caddy design. Use a separate 5-gallon bucket as a portable tool holder. Add a fabric or canvas organizer that hangs over the rim, creating multiple pockets for hand tools, gloves, seed packets, plant markers, and twine. These bucket organizers are available commercially, or you can sew one from sturdy fabric.
Tool recommendations for bucket gardening. You don’t need many tools for container gardening. Essential items include a hand trowel, pruning shears, a watering can or hose wand, and a moisture meter. Optional but helpful tools include a small cultivator, plant ties, and a folding stool.
Organizing supplies efficiently. Dedicate pockets in your caddy to specific tasks. Keep fertilizer and nutrients together, put marking supplies in one spot, and group harvesting tools separately. This organization saves time and frustration when you’re working in the garden.
Mobile supply station. A bucket caddy with tools moves easily from plant to plant. You’re not constantly walking back to the garage or shed for forgotten items. This efficiency makes gardening more enjoyable and less tiring.
Troubleshooting Common Bucket Garden Challenges
Even experienced gardeners encounter problems. Knowing how to identify and fix common issues keeps your bucket garden productive.
Wilting despite moist soil. If plants wilt even when soil feels damp, roots may be drowning due to poor drainage. Check that drainage holes haven’t become clogged. You might need to tip the bucket and clear blockages, or transplant to a new container with better drainage.
Yellowing leaves on lower stems. This often signals nitrogen deficiency, common in containers. Apply a nitrogen-rich fertilizer like fish emulsion. Yellowing that moves upward from the bottom is normal as plants mature and redirect energy to new growth.
Stunted growth and poor production. Plants that start well but stop growing may be rootbound. Roots fill the entire bucket, leaving no room to expand. Unfortunately, there’s no fix except transplanting to a larger container. This is why 5-gallon buckets work better than smaller sizes—they provide adequate root space.
White crusty buildup on soil surface. This salt accumulation comes from fertilizers and minerals in water. Scrape off the crusty layer and replace with fresh potting mix. Water thoroughly to flush salts through drainage holes. Reduce fertilizer frequency slightly.
Pests clustering on plants. Aphids, whiteflies, and spider mites attack container plants just like garden plants. Spray affected areas with a strong stream of water to dislodge pests. For persistent problems, use insecticidal soap or neem oil according to label directions.
Blossom end rot on tomatoes. This black, leathery spot on the bottom of tomatoes results from calcium deficiency, usually caused by inconsistent watering. Maintain even soil moisture, and consider adding calcium supplements to the soil.
Planning Your Bucket Garden Through the Seasons
Strategic planning helps you harvest fresh vegetables from spring through fall. Understanding seasonal timing maximizes your success.
Spring planting strategy. Start with cool-season crops like lettuce, spinach, radishes, and peas as soon as danger of hard frost passes. These vegetables tolerate light frosts and grow best in cooler weather. Plant warm-season crops like tomatoes, peppers, and cucumbers after all frost danger ends and soil warms.
Summer maintenance and succession. As spring crops finish, replace them with heat-loving plants. Plant beans every two weeks through summer for continuous harvests. Keep consistent with watering during hot weather—this is the most critical season for container irrigation.
Fall planting for extended harvest. Eight to ten weeks before your first expected fall frost, plant another round of cool-season crops. Lettuce, kale, radishes, and spinach grow beautifully in fall’s mild temperatures. These plants often taste sweeter after light frosts.
Winter preparation. In cold climates, empty buckets, clean them thoroughly, and store them upside down to prevent water accumulation and cracking. In mild-winter areas, you can grow cool-season vegetables year-round in buckets.
Budget-Friendly Bucket Gardening Tips
Creating a productive bucket garden doesn’t require spending hundreds of dollars. Smart choices keep costs reasonable while delivering excellent results.
Source free or cheap buckets. Ask at restaurants, bakeries, delis, and grocery stores. Many food service businesses give away clean, food-grade buckets. Sometimes you’ll pay a dollar or two per bucket, but this beats retail prices.
Make your own potting mix. Buying ingredients in bulk and mixing your own costs less than premium bagged potting soil. Combine equal parts coconut coir (or peat moss), perlite or vermiculite, and compost. For large gardens, this approach saves significant money.
Start plants from seeds. A packet of tomato seeds costs a few dollars and contains thirty or more seeds. A single tomato transplant costs almost as much. Invest in a simple seed-starting setup, and you’ll grow dozens of plants for the price of a few transplants.
Collect rainwater for irrigation. Place rain barrels under downspouts to capture free water. Rainwater also benefits plants because it lacks the chlorine and salts found in tap water. One inch of rain on a typical roof fills multiple barrels.
Make your own fertilizers. Compost kitchen scraps and yard waste to create rich, free fertilizer. Brew compost tea by steeping finished compost in water. Save coffee grounds and diluted urine (yes, really) for nitrogen-rich liquid fertilizers.
Share resources with friends. Split bulk purchases of soil amendments, fertilizers, and seeds with other gardeners. Trade extra seedlings, surplus produce, and proven bucket gardening tips. This community approach reduces costs while building friendships.
Making the Most of Limited Space
Many bucket gardeners work with small areas—a balcony, small patio, or modest yard corner. These space-maximizing strategies help you grow more food in less space.
Think vertically. Tall trellises and cages let climbing vegetables grow up instead of out. A 5-gallon bucket footprint of one square foot can support six feet of vertical growth. Pole beans, cucumbers, and indeterminate tomatoes all climb willingly.
Stack and tier containers. Create multi-level displays using shelving, plant stands, and hanging systems. This approach gives you more growing space in the same floor area. Place sun-loving plants in top positions and shade-tolerant herbs and lettuce below.
Intercrop compatible plants. Some vegetables grow well together in the same bucket. Plant fast-growing radishes or lettuce around slower tomatoes. Harvest the quick crops before tomatoes need full space. Combine tall plants with shallow-rooted companions.
Use every available space. Think creatively about where buckets can go. Sunny corners, fence lines, driveway edges, and garage sides all work. As long as spots receive adequate sun, they’re potential garden locations.
Choose compact varieties. Seed catalogs list space-saving varieties bred specifically for containers. These plants produce full-size vegetables on smaller plants. ‘Patio Princess’ tomatoes, ‘Spacemaster’ cucumbers, and dwarf bean varieties all maximize yield in minimal space.
Your Journey Starts With One Bucket
The beauty of bucket vegetable gardening lies in its simplicity and accessibility. You don’t need a yard, expensive equipment, or years of experience. You need buckets, soil, seeds or transplants, water, and sunshine.
Start with one bucket this week. Plant something you love to eat—a tomato, a pepper plant, fresh basil, or crisp lettuce. Place it where you’ll see it daily. Water it, watch it grow, and notice how satisfying it feels to nurture something alive.
That first bucket teaches you everything you need to know. You’ll learn when plants need water, how quickly they grow, and what success looks like. You’ll make mistakes—every gardener does—but those mistakes teach valuable lessons.
Before long, one bucket becomes five, then ten. You’ll find yourself planning next season’s garden in January, sketching layouts and studying seed catalogs. Friends will ask for advice, and you’ll realize you’ve become someone who knows about gardening.
Growing your own food, even in simple 5-gallon buckets, connects you to something ancient and essential. It grounds you in the seasons, teaches patience, and rewards effort with nourishment. It transforms ordinary days with the small miracle of watching seeds become dinner.
The bucket garden you start today becomes part of your life story. Years from now, you’ll remember your first harvest, the satisfaction of eating what you grew, and the peaceful moments spent tending plants.
So find a bucket, fill it with soil, and plant something. Your garden awaits, and it’s simpler than you ever imagined.

Welcome to MithilaConnect, where we curate the art of living, celebrating the vibrant tapestry of life through culture, fashion, food, and everything in between.